


Credit Application Demo – Video
[prisna-google-website-translator]
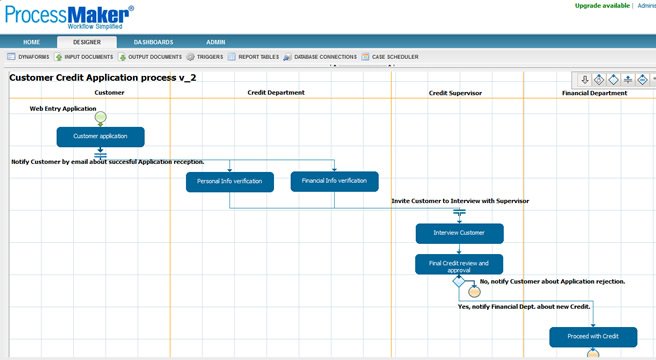
Credit Application Process
Despite being a slightly complicated and arduous process, the Credit Application Process has been immensely simplified with the power of ProcessMaker. The beauty of this particular process is that it can be initiated by anybody applying for credit from a bank or credit company.
The bank or credit company creates a form that can be hosted on one of their internet pages of their website. Prospecting applicants can navigate to that page and begin the application process by completing the form in its entirety. Various drop downs, grids and other useful fields are featured on the form to make it as user friendly and simple as possible and as with all ProcessMaker forms, the form can be fully customized with colors and graphics for standardization.
When the applicant submits the form, they are emailed immediately to inform them that the application has been received and is being reviewed. It is here that the application is sent to two different recipients of the credit department – one of these people will verify the personal information of the applicant while the other will verify the financial information. Each of these users can only see the information relevant to their task for data security reasons.
Assuming that both users of the credit department successfully verify the information in their relevant tasks, the applicant is emailed again inviting them to attend an interview at the bank in order to answer further questions to support their application. That task also features a form where the interviewer can take notes and complete more information about the request. If this is successful, then the case is passed onto a senior member of the bank in order to have repayment information established and the terms of the credit.
Finally, a manager or supervisor reviews all of the information before the credit is granted to the applicant.